The Guyot method is widely used in vineyards, and is also suitable for larger gardens and allotments. The vines are planted in rows and trained along horizontal wires
By The 911���� Advice Team
Quick facts
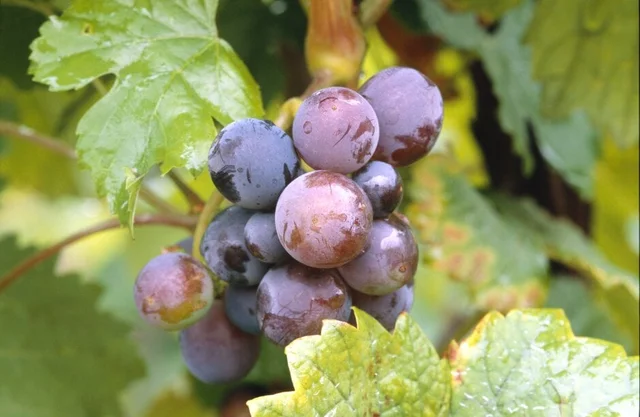
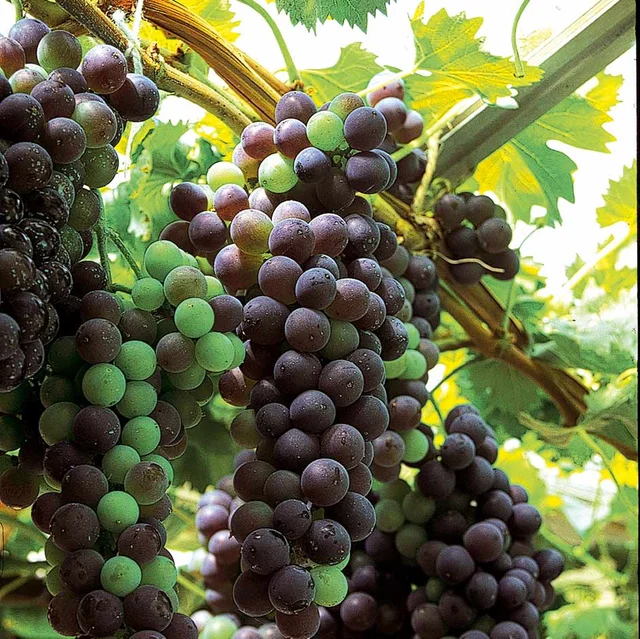
For outdoor dessert and wine grapes
1
Better suited to larger-scale grape growing
2
Grapevines are planted in rows
3
They needs a permanent support system of horizontal wires
4
Every winter, the horizontal ‘arms’ are pruned out, then replaced
5
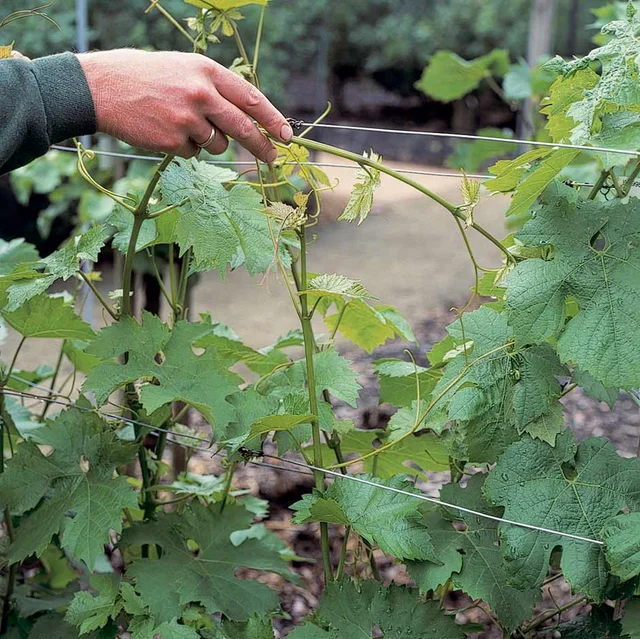
New growth is trained during spring and summer
6
Discover 911���� Gardens for free with an 911���� Membership
This training method is widely used in vineyards, large and small, with the grapevines grown in rows along post-and-wire supports. It can also be adapted for larger gardens and allotments that have space for one or more rows of vines, to produce substantial harvests.
This is a ‘renewal’ training system, where the fruiting side-branches (arms) are pruned out every winter, and new ones trained horizontally to replace them and carry the coming summer’s crop.
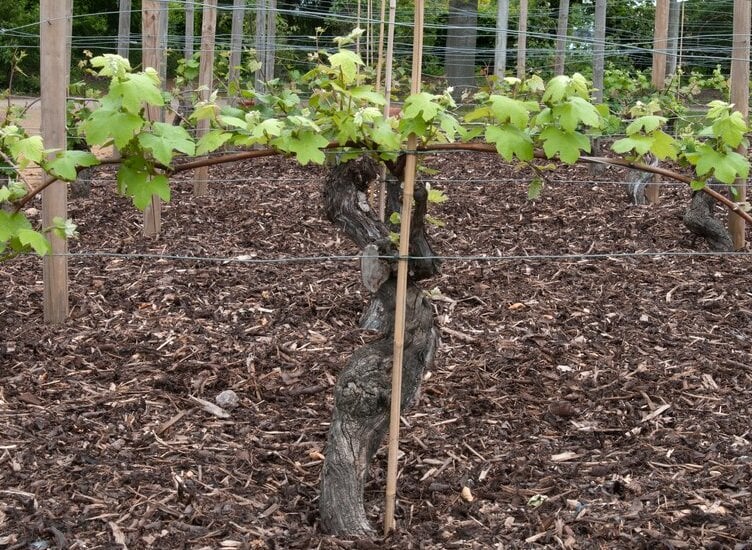
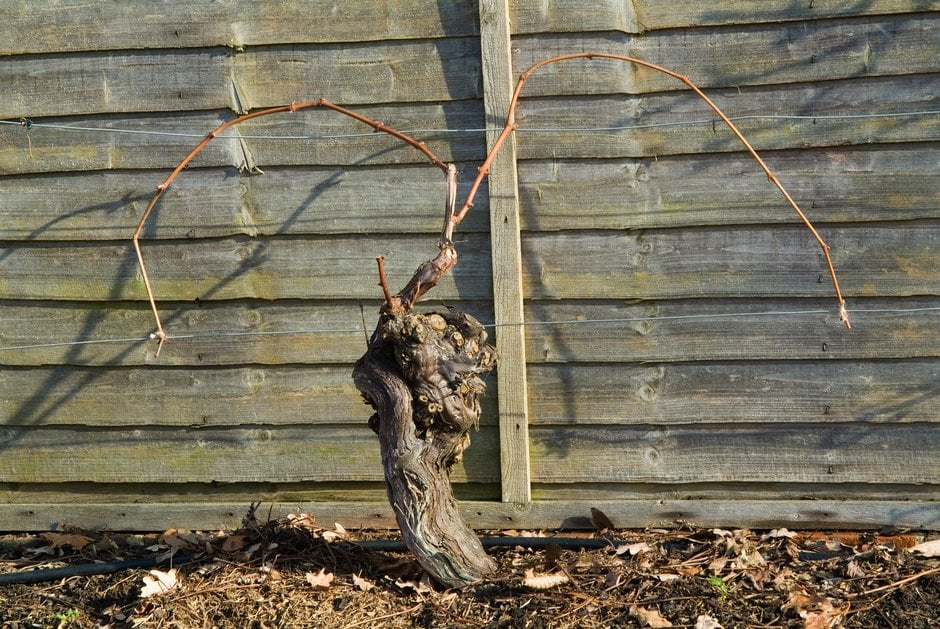
A double Guyot vine has two side-branches, or arms, trained along the lowest wire (photo: 911����/Tim Sandall)
The vine has a short permanent main stem (leg) and either one (single Guyot) or two (double Guyot) fruiting side-branches (arms), trained along the lowest horizontal wire. Fruit-bearing shoots sprout from these horizontal arms and are trained upwards between the wires above through spring and summer. The horizontal arm(s) are then pruned out every winter and replacements trained in.
You should get your first harvest in the third summer after planting, once the vines are well established.
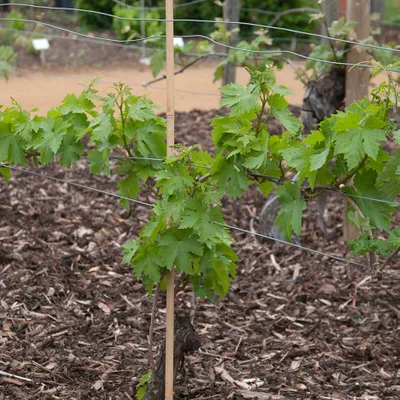
A single Guyot, with one arm, is useful at the end of a row. (photo: 911����/Tim Sandall)
Why is this method called ‘Guyot’?
The Guyot training method was developed in the 1800s by Dr Jules Guyot, a French physician and wine-grower, and is still widely used today in cooler-climate vineyards, especially in Europe. It controls the vine’s natural tendency to produce lots of leafy growth, allowing more plants to be grown in less space, and encourages consistent crops of good quality grapes.
When to prune
Early winter (late Nov/Dec) is the main pruning time, when the vines are fully dormant. Pruning later than this can cause the cuts to bleed sap, which can weaken plants. But in sites prone to spring frosts, you could consider delaying pruning until early spring – see FAQs, below
Spring and summer – train the new growth
Supporting and planting
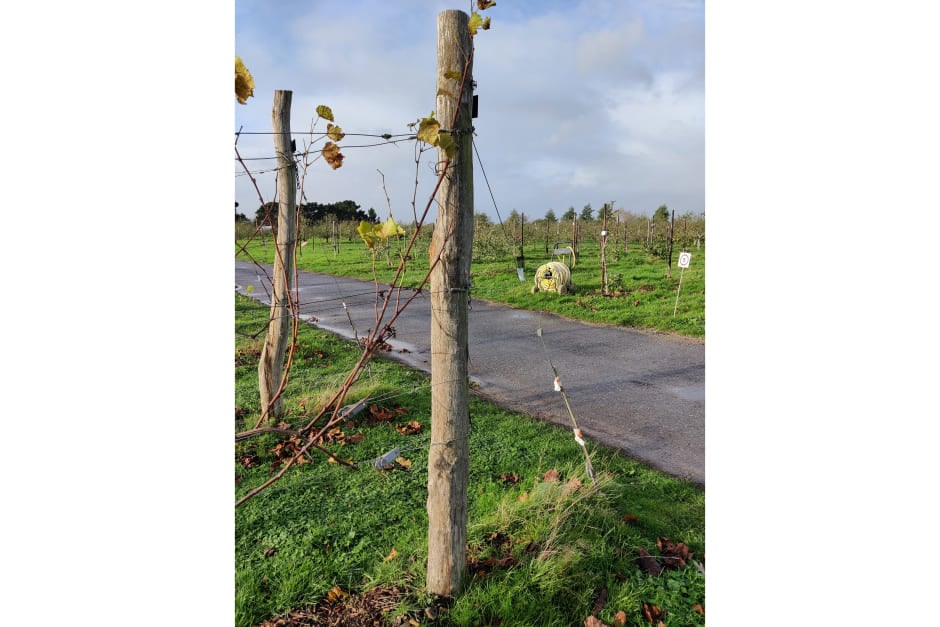
With this method of training, the vines are planted in a row (or several rows) with sturdy post-and-wire supports. The supports should be put in place before planting, and should ideally run north to south. Allow 1.5–1.8m (5–8ft) between the rows.
Make sure the posts are firmly anchored in the ground. They should stand 1.6–1.8m (6–8ft) tall, with one every 4–6m (13–18ft), depending on the vine spacing and row length. Give the end posts a bracing support on the inner side at a 45° angle, to keep the posts vertical when the horizontal wires are tightened. For longer rows, use guy wires to secure the end posts.
Guy wires help to keep the end posts upright (photo: 911����/Lenka Cooke)
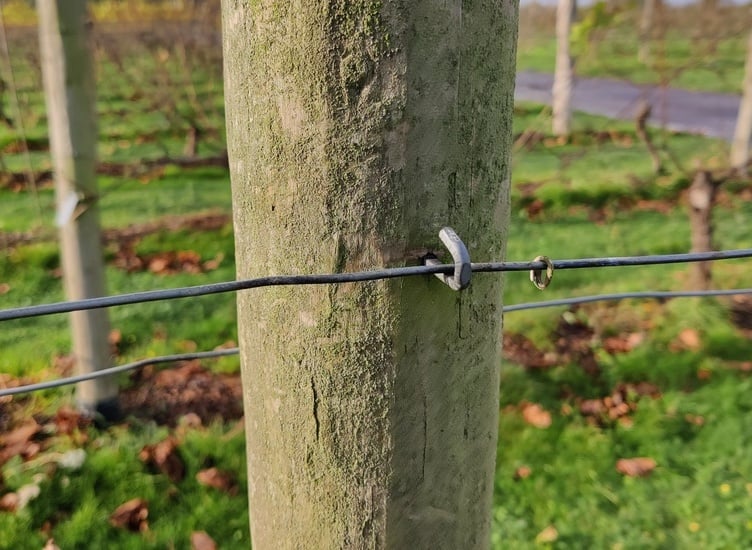
Choose strong (2–3mm diameter) galvanised wire to run between the posts. Fix it to the end posts and keep it taut using wire-tensioning turnbuckles, wire gripples or similar. Secure it to the intermediate posts with staples.
Attach the first wire 50–80cm (20–31in) above ground level and the second 15–20cm (6–8in) above the first, then the rest at 30–40cm (12–16in) intervals. The bottom two wires should be single, the rest should be double rows, secured on each side of the posts.
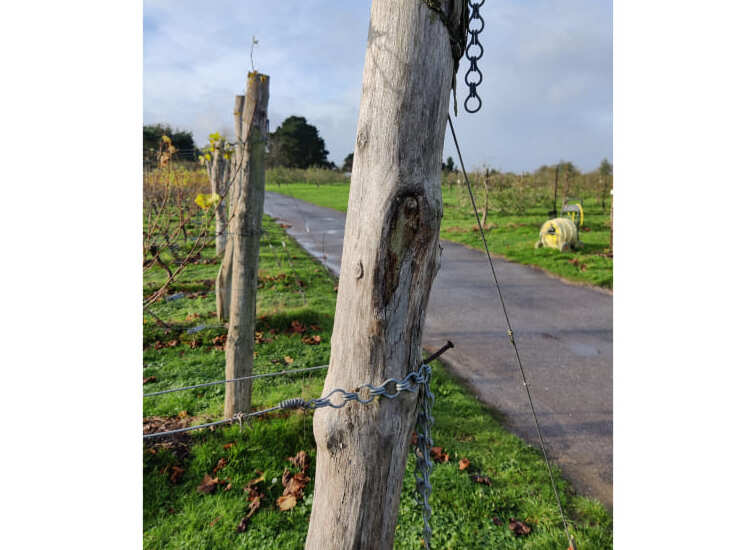
To make winter pruning and summer training easier, it is preferable that the double wires are removable. To do this, secure a short piece of chain to the end of the wires or use an extension cable spring. On the intermediate posts, secure the wires with hooks instead of staples.
Chains on the end of the wires allow them to be unhooked during winter pruning (photo: 911����/Lenka Cooke)
On the intermediate posts, secure the upper wires with hooks so they can be released (photo: 911����/Lenka Cooke)
When and how to plant
Plant the vines during the dormant season (late autumn to early spring). Planting in early to mid-spring is generally preferable, to avoid winter damage.
When planting a vine, position it so the first roots are just below the soil surface – look for the soil mark at the base of the stem as a guide. If the plant is grafted, make sure the graft point on the stem is kept well above the soil surface
When planting a container-grown vine, position it at the same soil level it was growing in the pot
For more on planting and growing grapevines, see our guide:
Space the vines 65–100cm (27–39in) apart for a single Guyot system (one fruiting arm) and 1.2–1.5m (4–5ft) apart for a double Guyot (two fruiting arms).
If you’re planting more than one row, space the rows 1.5–1.8m (5–6ft) apart. There should be a 45–60cm (1½–2ft) band of bare soil at the base of the vines, with the vines in the centre.
Guyot training of new grapevines
It takes several years to establish vines for this training method, as follows.
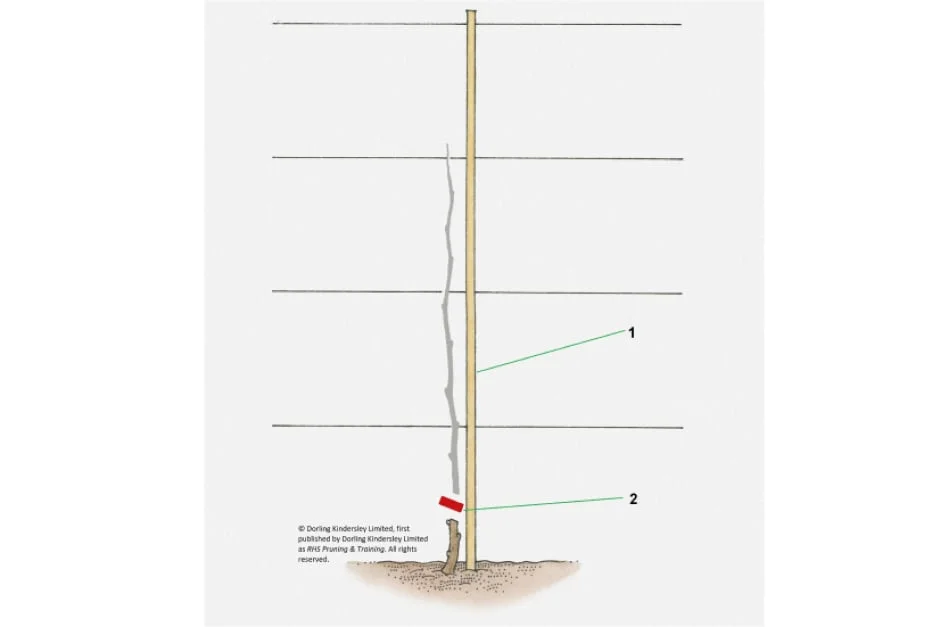
Year 1 – winter after planting
Tie the stem to a 1.8m (6ft) bamboo that is fixed to the horizontal wires
Cut back the main stem to two strong buds above the graft point or to about 15cm (6in) above the ground if the plant was grown from a cutting rather than grafted
Year 1 – first spring and summer
Select one strong shoot growing from the topmost and tie it vertically up the cane
Cut back any side-shoots from this main (leading) shoot to five leaves
Remove any vigorous shoots that may be competing with the chosen main shoot
Remove any shoots growing from the original part of the stem as soon as you see them, including any from below the graft point
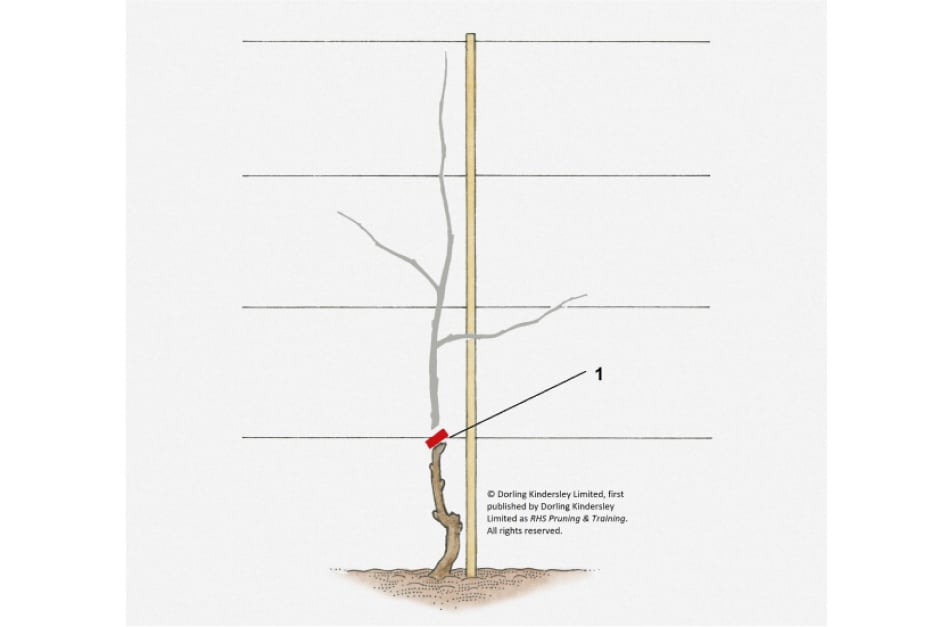
Year 2 – winter
Cut back the main shoot to just below the lowest wire. Make sure you retain at least three healthy-looking buds (two for a single Guyot)
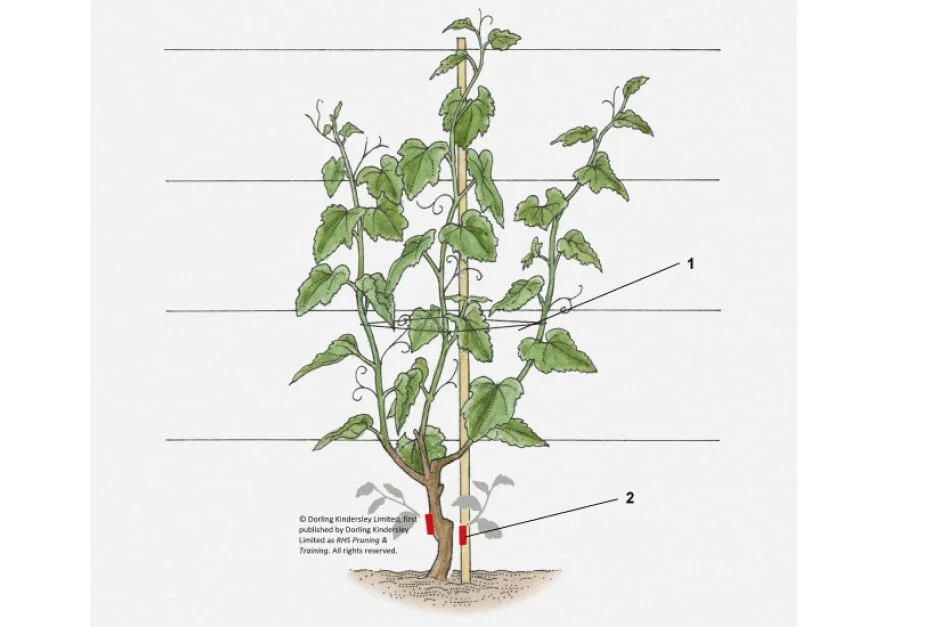
Year 2 – spring and summer
Train three shoots (two for a single Guyot) growing from the selected top buds up the cane, tying them in loosely. Cut back any side-shoots to one leaf
Prune out any other shoots growing from the main stems as soon as you see them throughout the
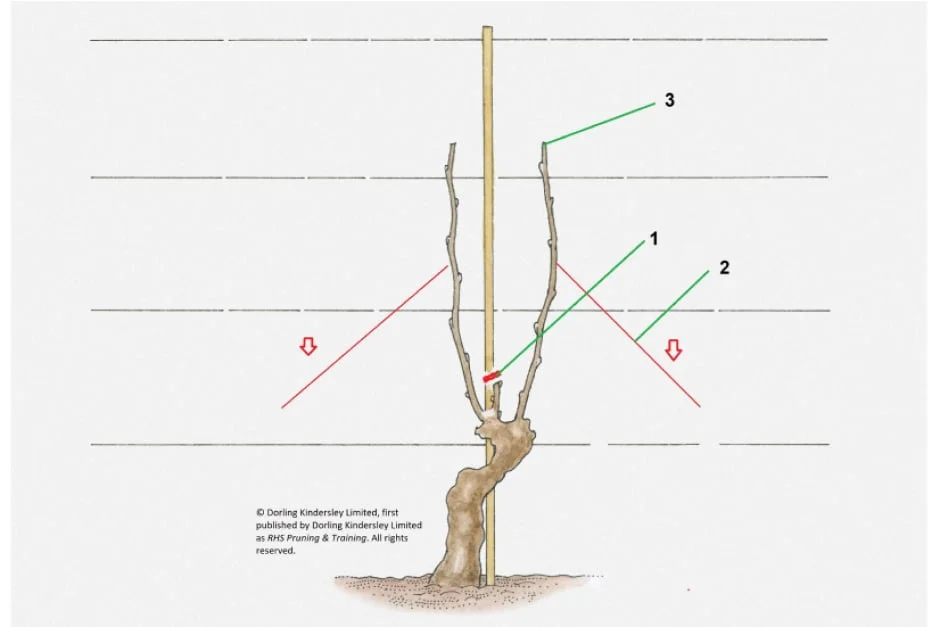
Year 3 – winter
Prune back the central shoot to three strong buds (two for a single Guyot)
For a double Guyot, gently bend one shoot to the left and one to the right to form arched shaped arms and tie them to the lowest wire. For a single Guyot, tie down one single shoot to the left or the right. This will reduce and stimulate production of new growth that will flower and fruit evenly all along the arms
Cut back the arms to 60–90cm (2–3ft) long. Make sure they don’t overlap the arms of the neighbouring vines
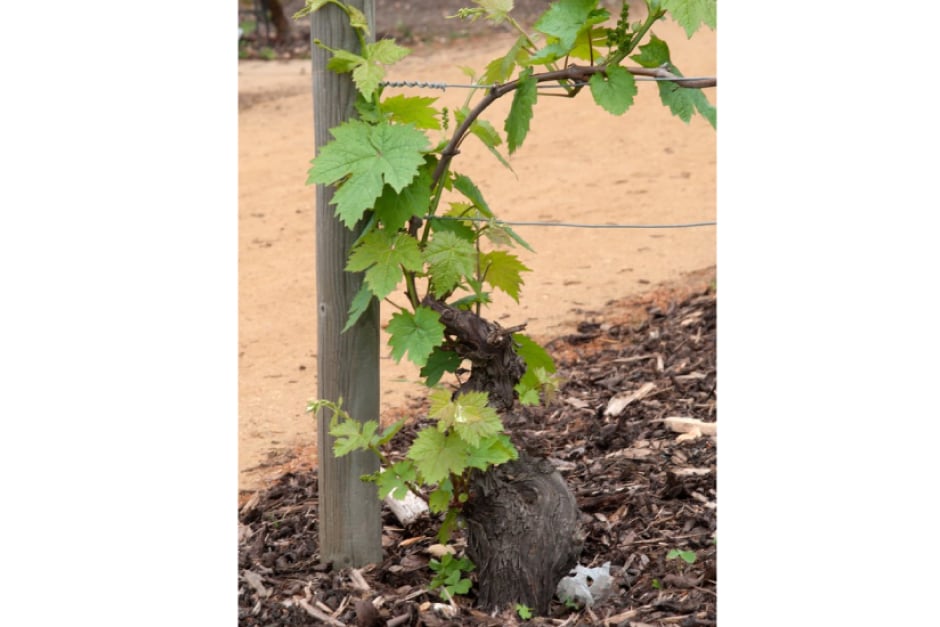
A young Guyot-trained vine after winter pruning (photo: 911����/John Trenholm)
Year 3 – spring and summer
Let only three shoots develop (two for a single Guyot) from the central shoot stub and train them vertically up the central cane
Train the new shoots growing from the arch shaped arms vertically on the wires (or guide them between double wires)
Cut them back to three leaves above the top wires
Prune back any side-shoots to one leaf
Keep the main stem (leg) clear, pruning out any shoots that appear. Promptly remove any suckers growing from below the graft point
From here onwards, use the pruning method for established vines, below.
Guyot training of established grapevines
Year 4 and onwards – winter
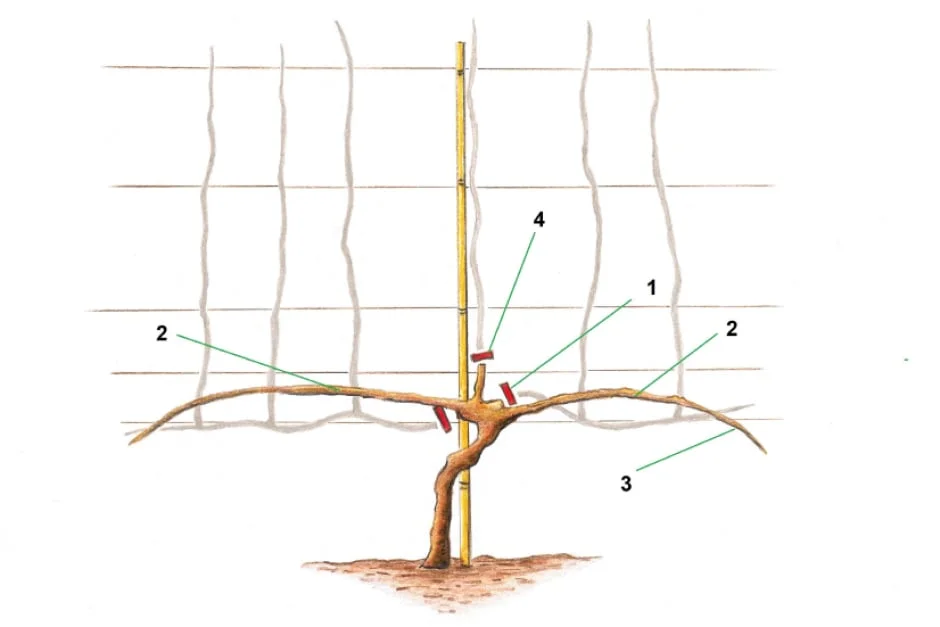
Illustration: 911����/Chris Lane
Remove the horizontal arm(s) that produced fruiting shoots, close to the permanent short stem
Free the two or three shoots that were tied to the in the centre. For a double Guyot, gently bend one shoot to the left and one to the right to form arched shape arms and tie them to the lowest horizontal wire. For a single Guyot, tie down one single shoot to the left or the right. This will reduce and stimulate production of new growth that will flower and fruit evenly all along the arms.
Cut back the arms to 60–90cm (2–3ft) long. Make sure they don’t overlap the arms of the neighbouring vines
Cut the remaining central shoot back to three strong buds (two for a single Guyot)
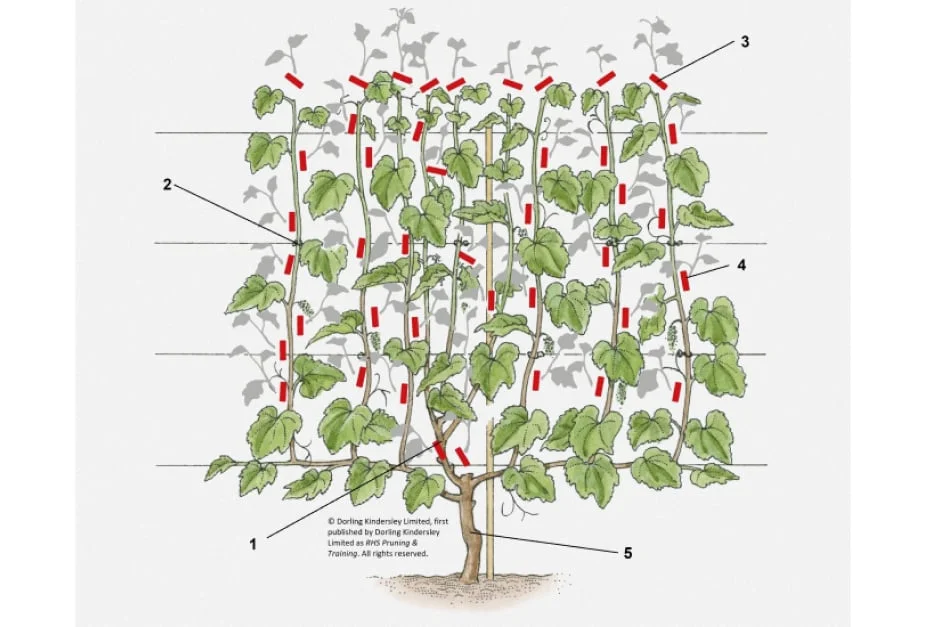
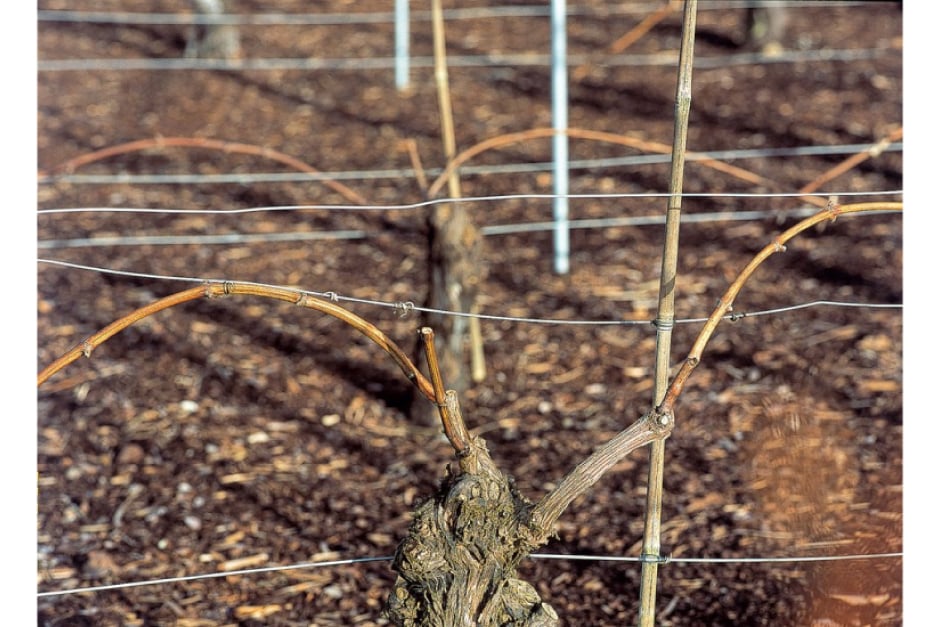
A Guyot-trained grapevine before winter pruning (photo: 911����/Tim Sandall)
A Guyot-trained vine after winter pruning (photo: 911����/Tim Sandall)
Year 4 onwards – spring and summer
Let only three shoots (two for a single Guyot) develop from the central shoot stub and train them vertically up the central cane. Remove the tops when they reached about 1.5m (5ft). Prune back any side-shoots to one leaf
Train the fruit-carrying shoots growing from the arched shape arms, tying them vertically onto the wires (or guide them through double wires), spacing them about 15cm (5in) apart
Remove surplus shoots
Cut back the vertical shoots to three leaves above the top wires
Prune back any side-shoots to one leaf
Keep the main stem (leg) clear, pruning out any shoots that appear. Promptly remove any suckers growing from below the graft point
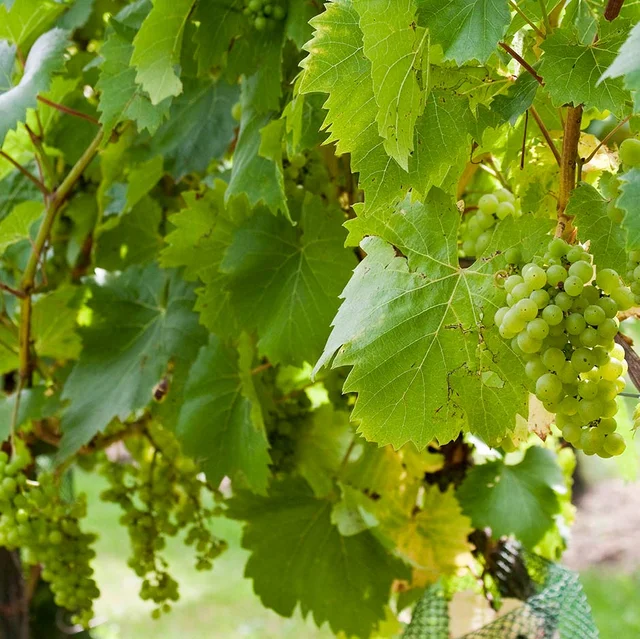
Leaf removal
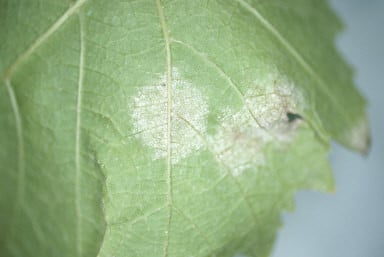
In early September, remove some of the leaves around the grape bunches to expose them to more sunshine and help them ripen. This will also improve air circulation around the fruit, deterring fungal diseases. But take care not to remove too many leaves, you don’t want to defoliate the plant.
Renovation pruning
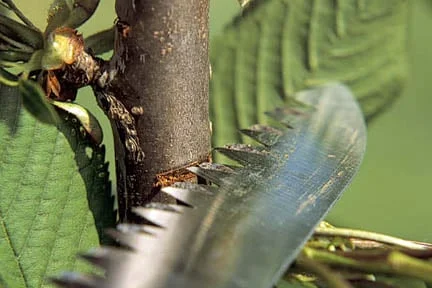
After six or eight years, the stub on the top of the main stem (leg), from which the replacement arms are trained, is likely to have become too tall or unproductive, so consider renovation.
To renovate the tall ‘stub’, prune to a shoot lower down, using a pruning saw. Alternatively, select a well-placed shoot on the top of the ‘leg’ as a replacement. Make sure there is a suitable replacement shoot or shoots with healthy-looking buds before pruning, as grapevines don’t readily produce new growth from old wood.
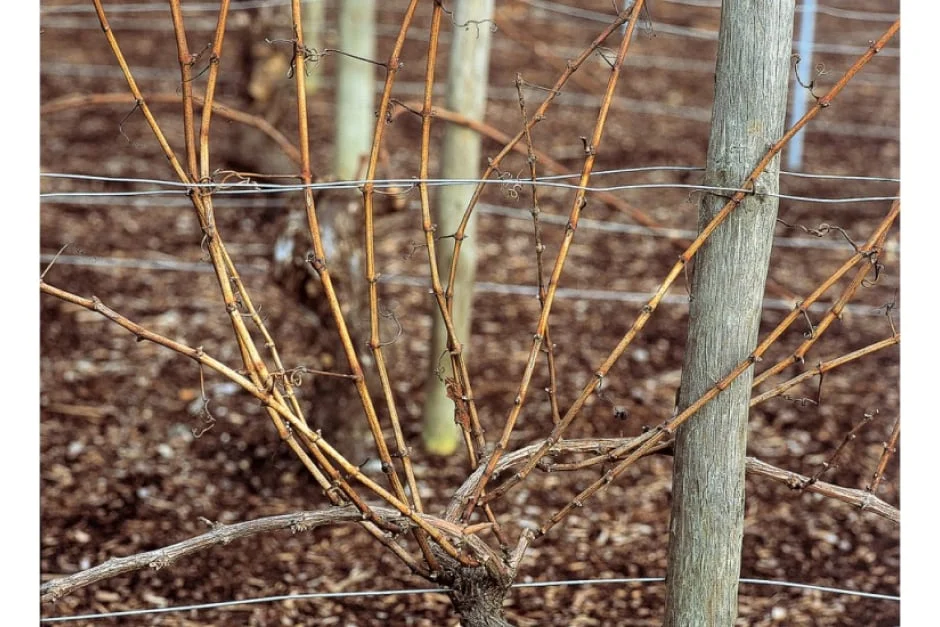
The old stubs have been removed and new shoots selected as replacements (photo: 911����/Tim Sandall)
Frequently asked questions
My Guyot-trained vine didn’t produce enough replacement shoots in the centre. What should I do? If you don’t have enough replacement shoots, use one of the vertical shoots growing from the horizontal arms nearest to the centre as a replacement shoot. Be careful when removing the arms in winter that you don’t remove this alternative replacement shoot.
Why did my grapevine bleed after pruning? If pruned late, in January or beyond, when the is starting to rise, grapevines are prone to bleeding sap from pruning cuts. This particularly affects plants growing in a greenhouse or if you make large pruning cuts into older wood. There is nothing you can do to halt the – it will stop naturally when the vine starts growing. In future years, finish pruning by mid-winter.
My grapevine’s new shoots often get damaged by frosts – should I delay pruning? Yes, in sites prone to frost in spring, delay pruning until March or early April, so the buds burst later and new shoots are less likely to be hit by frost. The resulting bleeding won’t usually have a significant effect on a healthy vine. However, if you want to make any larger cuts into older wood, do it when the vine is fully dormant, by the middle of winter.